You will want a fresh cut half log with nice firm bark. Fall and winter-cut wood seems to hold the bark better but if it is not fall or winter, press on anyway. I recommend using round cardboard templates to help you rough out a round blank from the half log. You will need a roundish piece which will fit on your lathe. You can rough it out with either a chain saw or band saw.

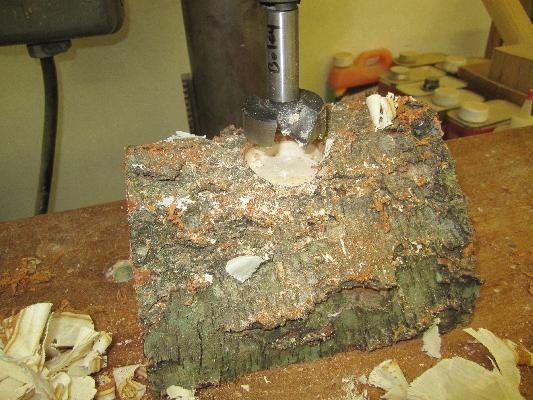
Use a Forstner bit to drill out a hole in the center of the bark side of the piece. That will provide access to solid wood below the bark for the spur drive to hold and spin the piece while turning. An alternative is to use a faceplate on the bark side. Since that side is curved, you may only be able to use two screws through the faceplate and will likely have to chip off some bark so you can get the faceplate close enough to the wood that the screws will bite. You could also use a large Forstner bit to clear the bark and make a flat spot for a small faceplate.

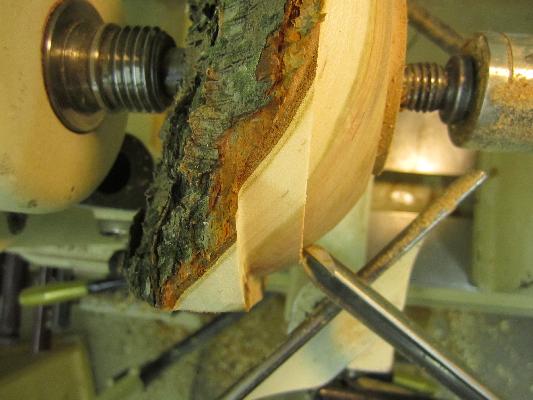
Shape outside and bottom of bowl, leaving a 3/8″ long tenon large enough to be held by jaws of chuck. Cut from bottom toward top of bowl. You may cut up from the tenon about half way to top of bowl and stop, then repeat for several cuts, leaving a “wall” where the upper half begins. Finish that last part from the top of the bark by cutting left to right from the outside top of bowl toward the bottom to help hold bark in place while cutting. This picture shows how to place the bowl gouge to shape the outside. Once outside is turned to shape, use thin CA glue to soak the exposed bark edge. If bark is somewhat loose or seems fragile, soak the face of the bark with CA glue, too, to help stabilize it.

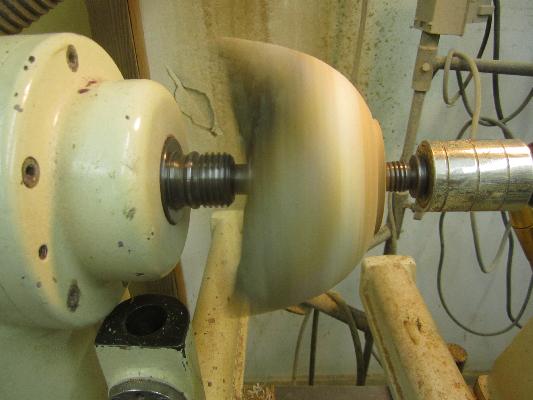
Note the ghost image when a natural edge bowl is spinning. Be very careful of your fingers and other body parts not to get them within the orbit of that ghost image. Before you take it off the lathe, shape the tenon to fit the jaws of your chuck. Remove the bowl from the lathe and grip the tenon in the chuck.
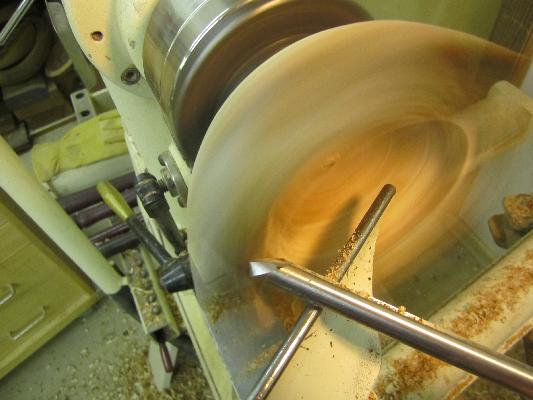
Turn inside of bowl, starting at center and working simultaneously toward outside edge and toward the bottom, per demonstration. This is really the tricky part. Watch your thickness closely and match the thickness of the sides to the thickness of the ends by cutting evenly as though the wood were solid all the way from the top edge to the bottom. Don’t be intimidated by the spinning ghost image of the top of the piece but do be cautious of the ends of the bowls as those whirling wings will hurt if you get your hand in there! Once you are nearly at the end, soak the inside edge of the bark with thin CA glue and let dry. Once the CA glue has dried, you can take one more thin slow cut from the outside top through to the bottom center to remove any fuzz in the bark which the glue hardened for you.

When completing the base of the bowl, put a piece of waste wood on a faceplate or in a chuck and turn a jam chuck. Pad the jam chuck with a paper towel and place bowl over shaped wood, then bring up tailstock to hold in place. Turn and shape base of bowl, getting as close to center as practicable. This is best done using a live center which is tapered toward the bottom of the bowl. Sand as far as you can toward the center.
Remove the bowl from the jam chuck, remove the small tenon on bottom with a saw and carving tool or chisel, and sand base of bowl. Hand sand with the grain to remove sanding marks.
If you wish to let the bowl dry before completing it, turn it so the thickness of the sides is about 1/10th of the diameter of the bowl to ensure enough wood is left after it dries to re-round it. Apply a product like Anchorseal and let it dry, then store it for a year. Before Anchorsealing it, I always mark the bottom with the type of wood as well as month and year so I later know how long it has been drying. When dry, re-turn to round, then to final thickness, and finish as desired. Since a bowl will tend to change to oval as it dries and a standard natural edge bowl will always appear to be oval anyway, you may wish to turn your green wood bowl to final thickness and sand it to finish. Once completed, let it sit for a couple weeks before you finish it to let it dry more thoroughly. Then hand-sand it with the grain and apply whatever varnish or other finish you wish.
